CARE GUIDES
How to Sharpen a Knife With a Whetstone
Learn how to sharpen a knife with a whetstone, choose grit, hold an angle, and refine the edge safely.
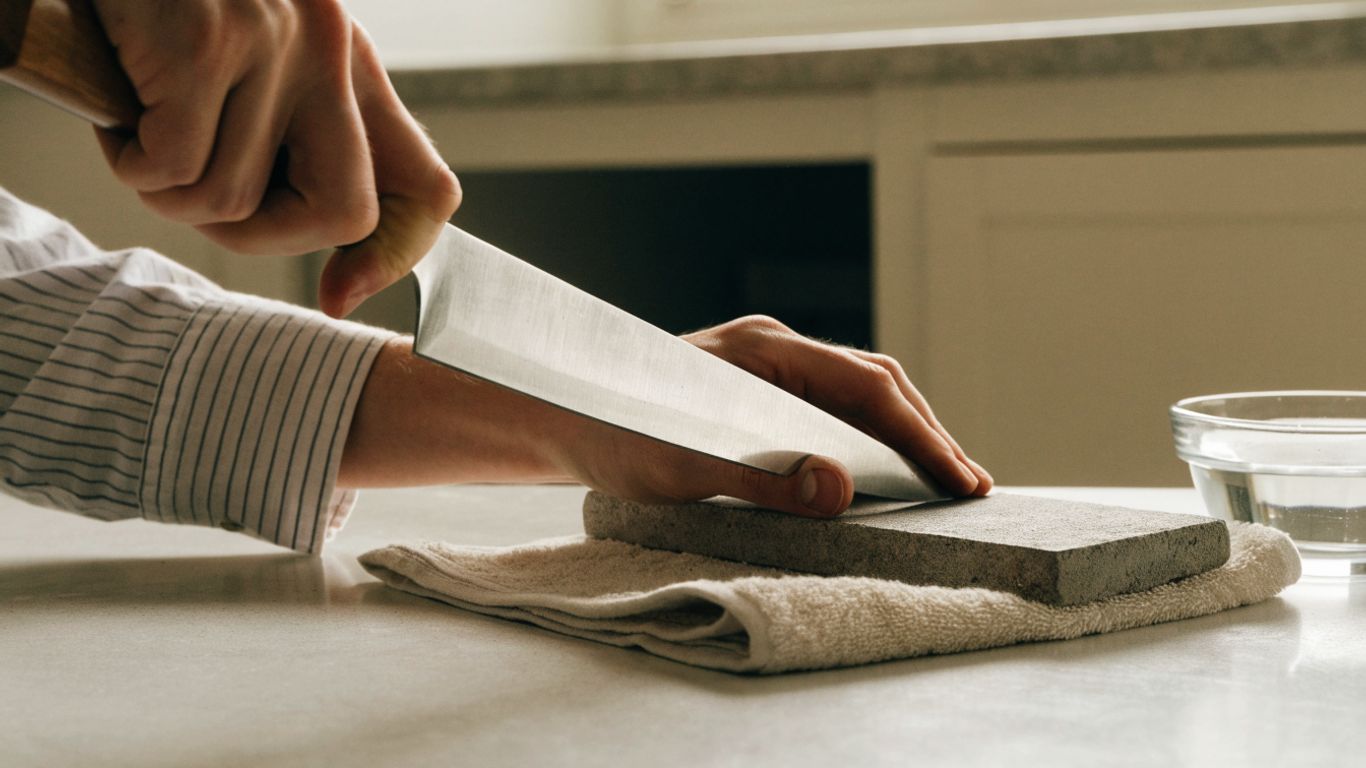
Choose the right whetstone for your knife
To learn how to sharpen a knife with a whetstone, start with a stone suited to the condition of your edge, then keep the blade at a steady angle as you work. This hands-on method suits home cooks who want to restore a dull kitchen knife and maintain it themselves. A medium-grit stone is a practical starting point for ordinary dullness; a badly damaged edge may need coarser abrasive, while a fine stone can refine an edge that is already shaped.
What grit numbers mean and when to use them
Grit describes how coarse or fine the stone’s abrasive surface is: lower numbers remove steel more quickly, while higher numbers make smaller adjustments and refine the edge. The ranges below are useful starting points, not universal standards, so check the stone maker’s recommendations before choosing a progression.
| Stone range | Typical use | Trade-off |
|---|---|---|
| 200–600 grit | Repairing a very dull or lightly damaged edge | Removes steel quickly, so use it only when needed |
| 800–2,000 grit | Sharpening an ordinary dull kitchen knife | A slower start than coarse grit, with more control for routine work |
| 3,000–8,000 grit | Refining an edge that is already sharp | Polishes the edge, but will not efficiently repair a badly dull one |
For most routine sharpening, you can begin and finish on a medium stone, then add a finer grit if you want a more refined edge. A coarse stone is not a shortcut for every knife: unnecessary grinding removes steel without helping an edge that only needs a touch-up.
Pick a coarse, medium, or fine stone for the edge
Choose by the knife’s condition, rather than buying the largest grit range you can find. If the blade is simply losing its bite, a medium stone is usually a sensible first choice; visible chips or substantial dullness call for more work and may require a coarser stone. Fine stones suit later refinement, but they cannot replace the steel removal needed to reshape an edge.
A double-sided stone can combine two useful grits in one tool, though the exact pairing varies. Before buying, check whether the stone requires soaking, how it should be stored, and whether the maker recommends flattening it over time. Sharpening at home takes practice, and rushing or pressing hard can round the edge or remove more steel than necessary.
Check whether your stone needs soaking or can be used dry
Whetstones do not all use water in the same way. Some water stones need soaking before use, some are meant to be splashed or kept wet on the surface, and some stones should be used dry or with another lubricant. Follow the stone’s own instructions rather than assuming that every stone belongs in a bowl of water.
Using the wrong preparation can make sharpening messy or damage the stone. If you are unsure, check the maker’s instructions before wetting it; a little preparation prevents a frustrating start.
Prepare your knife, stone, and workspace
Before sharpening, clean the knife, check the edge, and set the stone on a surface that will not shift. Those simple steps make it easier to control the blade and see what the stone is doing. If you are new to the process, a careful setup matters as much as the sharpening strokes themselves.
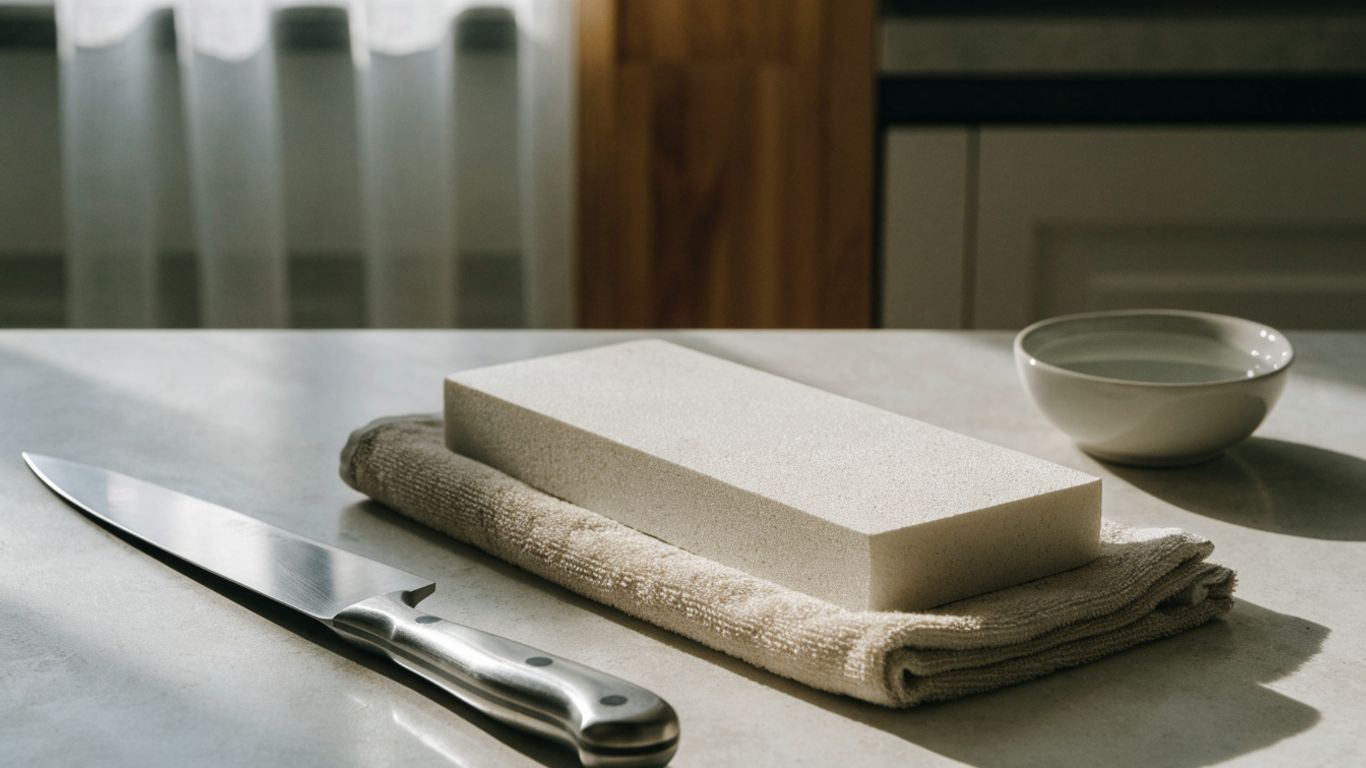
Clean the blade and inspect the edge for chips
Wash and dry the knife before you begin so food residue does not collect on the stone. Under good light, look along the edge for chips, dents, or sections that seem more rounded than the rest. A small patch of dullness can be handled with ordinary sharpening, while a deep chip may take more time and steel removal than a routine touch-up.
If the knife has a serious chip or damage near the tip, avoid trying to grind it away quickly. An uneven repair can change the blade’s shape, so take small, measured passes or seek help from a qualified sharpener.
Set up a stable surface and keep the stone from slipping
Set the stone on a flat counter with a non-slip base, or place a damp towel underneath if the stone has no holder. Keep a clear working area around it, and position the stone so you can move the knife without reaching across your body. A slipping stone can turn an otherwise controlled stroke into a cut.
A short setup routine helps you start consistently. Before placing the knife on the stone, check that you have:
- A clean, dry blade and a clear view of its edge.
- A stable stone that does not rock or slide.
- Good light and enough room to move the knife safely.
- A towel nearby for wiping water and stone slurry as needed.
Once the stone is secure, keep your fingers clear of the cutting edge and use a controlled grip throughout the session. For related guidance on sharpening a kitchen knife at home, see the separate overview of sharpening methods and edge checks.
Wet or soak the stone according to its instructions
Prepare the stone in the way its maker specifies. If it is a soaking water stone, use the recommended soaking time; if it needs only surface water, wet the surface as directed. Some stones should not be soaked at all, so do not use a generic soaking routine in place of the product instructions.
During sharpening, add water when the surface begins to dry if the stone’s instructions call for it. A thin slurry may form as the stone and blade work together; that is normal for many water stones, but the details vary by type.
Find and hold a consistent sharpening angle
A consistent angle is more useful than chasing a supposedly perfect number. Start by following the knife’s existing bevel, then keep that angle steady through each stroke. The right angle varies by knife, and changing it repeatedly can leave you with a rounded or uneven edge.
Match the angle to the knife’s existing edge
Look at the bevel, the narrow sloped area that meets the cutting edge. If it is visible, place the blade so the bevel sits flush against the stone; that gives you a practical reference for the angle the knife already has. A knife with a very worn or altered edge may not show a clear bevel, so work carefully rather than guessing and making abrupt changes.
If you want broader step-by-step context, the guide to kitchen knife care covers practical care for knives and other wooden kitchen tools. Keep the actual sharpening decision focused on the blade in front of you, since knives can have different edge shapes and angles.
Use a simple guide to estimate the angle
When the bevel is hard to see, estimate the angle by lifting the spine of the blade a small distance from the stone. Many kitchen knives are sharpened somewhere around 15–20 degrees per side, but that is a rough reference, not a rule for every knife. The maker’s guidance and the existing edge should take priority when available.
You can also use a simple angle guide if you have one, especially while learning how the blade feels at a steady angle. Keep the guide clear of the working edge and make sure it is compatible with your sharpening setup.
Keep your wrist steady as you move the blade
Try to move your forearm and hand together so the blade does not tip up or down midway through a stroke. It can help to pause and reset your grip before the next pass rather than forcing a long, awkward motion. A steady angle matters more than speed when you are learning.
Use light pressure at first and pay attention to how the blade contacts the stone from heel to tip. Slow, controlled movement gives you time to notice if the angle starts to change.
Sharpen the first side of the blade
Work one side of the edge at a time until you can feel a burr along the opposite side. A burr is a thin lip of steel that forms as the sharpening strokes reach the edge; it tells you that you have worked through that section. Keep the stone prepared as directed and use an even, deliberate pace.
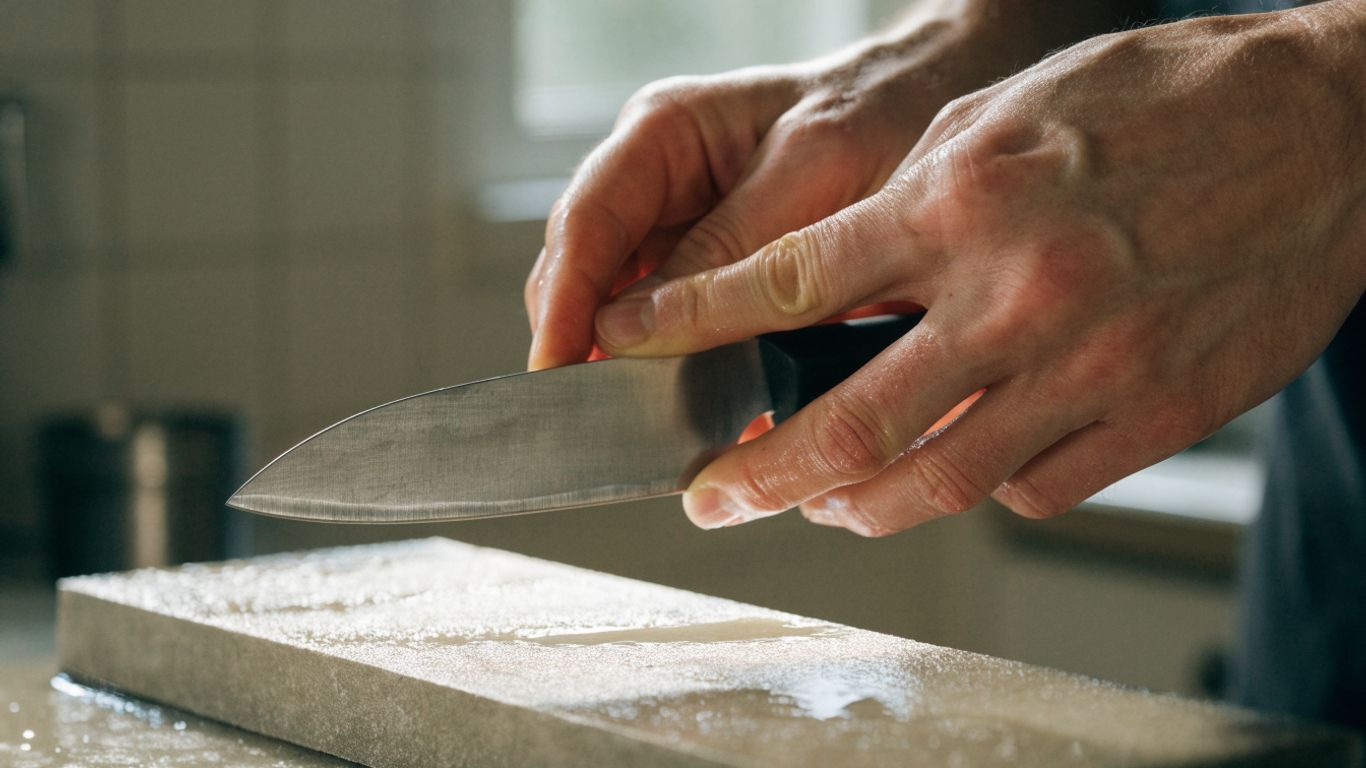
Start at the heel and work toward the tip
Place the heel of the blade on the stone at your chosen angle. Move the knife so the section you are sharpening travels across the abrasive, progressing along the edge toward the tip. Depending on your stone and technique, the blade may move forward, backward, or in both directions; the important thing is to keep the angle and contact controlled.
As you approach the curved tip, lift the handle slightly to follow the curve rather than letting the tip flatten against the stone. Practice this motion slowly. A rushed turn can leave the tip rounded or uneven.
Use even pressure and cover the full edge
Use moderate, controlled pressure and work in overlapping strokes so you do not leave an unsharpened patch between sections. Keep the same angle as you move from heel through the middle and out to the tip. If the blade starts to feel unstable, pause and reset rather than trying to correct it mid-stroke.
You may need to spend more time on one section if it is noticeably duller, but avoid grinding only that spot until it forms a dip. Check your progress across the whole edge as you go.
Look and feel for a burr along the opposite side
After working one side, check for a fine burr on the opposite side of the edge. Move a fingertip carefully away from the edge, from the spine toward the cutting edge, and never slide along the blade. You can also use a fingernail lightly and cautiously to notice a change in feel.
A continuous burr from heel to tip suggests the whole edge has been reached. If it appears only in patches, continue with controlled strokes on the areas that need them before switching sides.
Sharpen the other side and refine the edge
Once a burr has formed along the opposite side, turn the knife over and work the other bevel. Then reduce the pressure and alternate sides to remove the burr. This second stage is not about grinding as aggressively as possible; it is about bringing both sides together cleanly.
Flip the knife and repeat the same strokes
Use the same angle and cover the full length of the edge on the second side. If you counted strokes on the first side, matching that number can be a useful starting point, but let the edge condition guide you rather than treating the count as a guarantee. Check for a burr again, this time on the side you first sharpened.
Keep your grip and movement consistent as you change sides. If the knife feels awkward in one hand position, stop and adjust the way you hold it before continuing.
Reduce pressure as the edge comes together
As the two bevels meet, lighten your pressure. Heavy strokes at this stage can create a larger burr or disturb the edge you have just formed. Let the abrasive do the work, and make fewer, more controlled passes as the edge begins to feel sharper.
If you are unsure whether the edge is ready, pause and inspect it under good light. A bright reflection along the edge can indicate a flat spot that still needs attention, though the test is easiest to interpret when the blade is clean and dry.
Remove the burr with alternating, light strokes
Make a few light strokes, alternating sides after each pass. Keep the same angle but use much less pressure than you used to establish the bevel. The goal is to remove the thin burr without folding it back and forth or creating a new one.
Wipe the blade and check the edge carefully before testing it. If the burr remains, return to a small number of very light alternating strokes rather than pressing harder.
Check your progress and fix common problems
Test the knife carefully after wiping away slurry and drying the blade. A simple paper or tomato test can reveal whether the edge cuts cleanly, but no single test tells you everything about the bevel. If the knife still catches or slides, return to the stone and work patiently instead of pushing harder during the test.
Test sharpness safely with paper or a tomato
Hold a sheet of paper by one edge and make a controlled cut away from your fingers. A sharp knife should begin the cut without snagging; do not use your thumb to brace the paper near the blade. For a tomato, let the knife’s edge start the cut with minimal pressure rather than forcing the blade down.
Treat either test as a quick check, not a reason to handle the knife carelessly. A sharp edge can cut with very little pressure, so keep your hands out of its path and put the knife down before adjusting your grip.
Correct a rounded edge by resetting your angle
If the knife remains dull, you may have raised the spine too high or too low and missed the bevel. Clean the blade, return to the stone, and find the existing bevel again before making more strokes. Use a marker on the bevel if needed: a few careful passes can show whether the stone is contacting the full bevel or only one part of it.
Work in short sets and check the result. Changing the angle repeatedly makes it harder to form a clean edge, so choose a position you can hold and keep it consistent.
Address scratches, uneven bevels, or a stubborn burr
Light scratches on the blade face can happen if the blade rubs against the stone; careful positioning and a controlled stroke help limit them. If one bevel appears much wider than the other, you may have spent too long on one side or held a different angle. Return to the affected side with measured strokes rather than trying to correct the whole edge at once.
A stubborn burr often means you are using too much pressure or not alternating sides enough during refinement. Reduce pressure, clean the blade, and make a few light passes on each side. For major chips or a badly uneven edge, a professional sharpener may be a safer choice than aggressive grinding at home.
Clean and store your knife and whetstone
After sharpening, rinse the blade if its care instructions allow, then dry it fully before putting it away. Clean the stone according to its maker’s directions and let it dry as recommended. Keeping both tools clean and dry helps you avoid residue, corrosion, and damage during storage.
Rinse and dry the blade after sharpening
Rinse off any remaining slurry and wipe the blade clean, taking care to keep your fingers away from the edge. Dry the knife promptly, including around the handle and any joints where moisture could linger. Follow the knife maker’s care instructions, especially if the blade has a finish or construction that needs particular attention.
Store the knife so its edge is protected and it cannot move loose in a drawer. For options and safety considerations, see the guide to safe knife storage.
Clean and dry the stone before putting it away
Remove stone residue as directed by the maker, then allow the stone to dry fully if it is designed to dry between uses. Some stones need a different routine, so do not leave one soaking or store it damp unless its instructions say to do so. Keep it in a place where it will not be dropped, chipped, or exposed to temperature extremes.
If the surface becomes uneven, check whether the stone needs flattening and what method its maker recommends. A flat surface makes it easier to keep consistent contact with the blade.
Maintain the edge with regular honing and occasional sharpening
Honing and sharpening are different jobs: honing helps realign an edge that has started to bend out of line, while sharpening removes steel to form a new edge. Use a honing tool only if it suits your knife, and sharpen with a whetstone when honing no longer restores the cut. How often that is needed depends on how frequently you use the knife and how you care for it.
A few careful minutes of maintenance can help you avoid waiting until the edge is severely dull. Check the knife regularly, use the right tool for the condition of the edge, and stop if you are unsure about a repair.
Frequently Asked Questions
How long does it take to sharpen a knife with a whetstone?
A routine sharpening may take several minutes, while a very dull or damaged edge can take longer. The stone, knife condition, and your practice all affect the time.
Should you soak every whetstone before using it?
No. Some stones need soaking, others need only surface water, and some should be used dry or with a different lubricant. Follow the maker’s instructions for your specific stone.
What grit should a beginner use?
A medium stone in roughly the 800–2,000 grit range is a practical starting point for a normally dull kitchen knife. A severely dull or chipped edge may need a coarser stone, while fine grit is for refinement.
What angle should you use on a kitchen knife?
Many kitchen knives are sharpened around 15–20 degrees per side, but the right angle depends on the knife. Match its existing bevel or follow the maker’s guidance when available.
How can you tell when you have sharpened one side enough?
A fine burr along the opposite side, from heel to tip, is a useful sign that you have reached the edge. Check carefully and move your fingers away from the cutting edge.
Can you sharpen a chipped knife with a whetstone?
A small chip may be repairable, but removing it can require substantial steel removal and change the blade’s shape. For a deep chip or an edge that is badly uneven, consider a qualified sharpener.
How do you know whether the knife is sharp enough?
Try a controlled paper cut or let the knife start a cut in a tomato with little pressure. Keep your fingers clear, and remember that a test is only a check, not a reason to handle the edge casually.
SEE AN EXAMPLE
How this guide was put together
The Cutting Board Care Guide team writes and fact-checks every guide on Cutting Board Care Guide. Comparisons are based on maker specifications, published standards and food-safety guidance from sources such as the USDA, and each guide is reviewed and updated when specs or prices change. More about us.